Showing posts with label crafting. Show all posts

2 DIY//Bolster Recover

COMMENTS

Friday, February 24, 2012

Hey bloggity friends today Im coming to you with an insanely easy DIY.
Im not kidding this took me less than 30 min to pull off and Im pretty sure you need minimal sewing skills to accomplish it.
Im still working on the toddler room, yes it is quite the process but its almost done. yay. happy dance.
Im just adding a few last min touches and today im here to share one with you!


I have literally had this bloster for 100 years. ok maybe more like 17. Either way it's reallllly old. My momma made it for me originally and at one point it was nice and shiny and new but now its old and stained and in need of a total makeover.

So here is what you will need:

Fabric : amount varies depending on the size of your pillow but it needs to be able to wrap around it with room to spare and Id say you need at least a foot of fabric on each end

Thread

Sewing machine (or hand stitch)

Ribbon

Scissors

Safety pin

Pencil


Step one - make a 1/2in -1in fold on the end of the fabric


Step two - Fold again the same amount  so that there is no raw edge. You can iron the fold down if it makes it easier 


Step three - fold it up to the pillow and make sure it come a little more than half way


Step four - Stitch the fold down. make sure that space from the end of the fabric to the stitch line is wide enough to fit your ribbon

make sure to do this on both ends of the fabric


Step five - pin the right sides together around the pillow. Make sure it's tight. 


Step six- use a marking utensil to mark where your pins are on both sides of the fold. Then take the pins out and remove the pillow. Place the pins back in using the markings to help you


Step seven - stitch along the markings. ****Make sure NOT to cross over your width stitches**** I didnt take a picture of this because I skipped over this step and had to use a stitch remover. I know it's a little hard to understand so feel free to message me if you have a question and Ill try to better explain it!


Step eight - cut a piece of ribbon. You want to make sure its as long as the width of the fabric. You can always cut it at the end but it's better to have it too long than too short. Attach a safety pin to the end of your ribbon


slide pin into one end of the opening you created in steps 1-4. work it's way through to the other side.

then shimmy your pillow into the case. You may need an extra hand for this part!


Step ten - once threw pull the ribbon until it scrunches in a circle and tie in a knot then a bow. 
Do this on both sides


And there you have it. 
Its seriously so simple and it gives you a whole new look.
Im super happy with the results and it was way less costly then buying a whole new bolster!
I hope this wasn't too confusing to follow and if you have any questions at all feel free to message me!!
And let me know if you try it out!!!

5 Getting my Creative on

COMMENTS

Friday, January 20, 2012


What iv been working on in my spare time (like I have any) 
This is my besties family. Some of my favorite people ever (that includes the dog, in fact it's mostly all about her)

Happy Friday friends! 

5 Sneak A Peek

COMMENTS

Tuesday, November 22, 2011


Sneak a Peek at Peyton's big girl room. It's still a major work in progress but it's coming along. She is officially sleeping in her big girl bed and I may or may not have (totally did) cry like a baby when I took her crib apart. Dont judge.
She freaking loves it. If we are at home she is up in her big girl room. She watches movies in her big girl bed. She wants to read books 'down stairs mommy' (it's upstairs btw, we're working on it) She wants to take naps, she wants to go to bed. It's like uh why didn't we do this a while ago? I'm sure it wont last but for now we are soaking it up. 

here are just some instagram pics of the DIY and crafts that have been going on in the big girl world!


4 DIY//Squirrel Feeder

COMMENTS

Monday, November 21, 2011


Today was kinda gloomy but still pretty warm for November so P and I decided to take advantage and do something crafty dealing with the outdoors. We have had lots of sneaky squirrels running around and eating our pumpkins so we thought maybe if we made a squirrel feeder it would distract them. It was quick and easy and P had fun so here is how we did it!


I had an empty puffs container laying around so that's what we used. I didn't research if the squirrels may try to eat the plastic or not so sorry in advance for any PITA/squirrel lovers out there this may end badly


next I used a cork screw to poke some holes into the top of the lid (2 holes)


Then we used a meat tenderizer to smash up some nuts. We had cashews laying around but obviously any nut will do


We always have so much bread and often one or two pieces get left behind so this is a great way to waste not. Crumble up a few pieces of old bread. It works best if you have an extremely adorable helper.


Then we threw in some trail mix for extra yumms... agin didn't do my research so Im not sure if squirrels are like dogs and can't eat chocolate but I guess Ill find out soon enough.
We also threw all of the mix on a sheet of tin foil


Then have your adorable little helper smear peanut butter all over the container


Roll the container through the mixture and then pick up some of it and smooch it on the spots that are empty.


Next string some yarn though the holes in the lid. You may want to hot glue the lid to the container to prevent it from coming off when the squirrels attack.


lastly find the perfect branch to hang your feeder from. We picked one that we can see from our window so we can easily see if its being used with out scaring the squirrels. 

And there you have it! Super easy and easily done with things around the house! Happy squirrel feeding!

0 Refreshed

COMMENTS

Saturday, November 19, 2011


holy moly I think that was the longest break iv taken from the blog since I started posting regularly. I just needed to step away from the computer for awhile and it was good. Great even. But now I'm back! Well I may not be really really back till Monday but I am alive so that is probably great news for you right?  If you have been following me on twitter (@thepenutgallery) or instagram (abussard7) then you know Iv been busy crafting and painting for Peytons big girl room! I even have a pretty fun DIY coming up soon so be on the look out! 
Its getting colder around here winter is right around the corner and so is Thanksgiving! YUM! There is going to be a lot of house cleaning, crafting, baking and cooking around here this next week and I'm pretty excited. I love Thanksgiving and all the food that comes along with it!
Today we are off to dance class and the farmers market and then Im not really sure what we are going to do the rest of the day but it's looking like a nice one! What do you all have planed for this lovely Saturday?

3 Pinned it!

COMMENTS

Wednesday, October 26, 2011

It's so easy to get wrapped up in Pinterest and not actually do anything except slowly start to feel unaccomplished and really not cool. But every once in a while you remember that you actually pinned some of these things for a reason and that you actually wanted to give them a try. Iv been slowly checking  things off my Pinterest and it makes me feel less guilty about spending countless hours on it.

I have been wanting to do this one for.like.ever. Its under my 'Wedding Inspiration' and since my wedding is now less than a year away (whhhaaattt?!) I figured I should get on planning it right? 
Here is a picture from the original pin 


and here are some pictures from my attempt. Im pretty happy with them (2 of them dont have candles jic you were wondering)


6 Tights in action

COMMENTS

Monday, October 24, 2011

Here are a few shots showing off my DIY food colored tights! I'm like really happy with the way these turned out. The pink ones were extra splotchy on and very noticeable so Ill just file those under 'trial and error.'


Also? Michelle over at She Said is having a fashion week on her blog filled with some awesome advice from some awesome bloggers so check it out all week. I have two featured posts and Ill keep you all posted when they pop up!


4 DIY//Food Color tights

COMMENTS

Friday, October 21, 2011

If you follow me on twitter or instagram then you probably already know yesterday I was working on a little DIY. If not, well then you should. Also yesterday I was working on a little DIY. Ok now are we all caught up? Great, lets get down to business. Im working on a guest post for a fellow blogger (ill tell you more about that soon) but for the post I needed some colored tights. I could have run out and bought some but I thought it would be fun to try and dye them myself and so I did. DIYs are all about trial and error right? So I tried and I had a little error but I also had some success so here is what I came up with:


what you need:

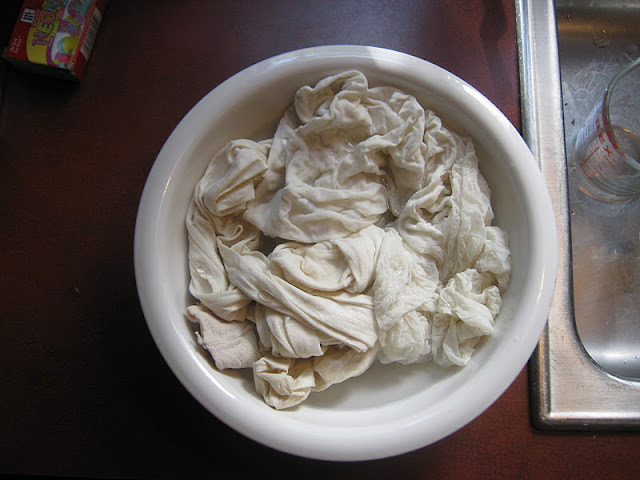
Tights
Water
Pot
Vinegar
food coloring


Pour water into a pot. From reading around I used 4 cups for one pair of tights.


add 1 T vinegar for every cup of water you use. In this case 4 T


while you are prepairing the water and letting it heat let the tights soak


Add food coloring to the water. I followed the white icing instructions


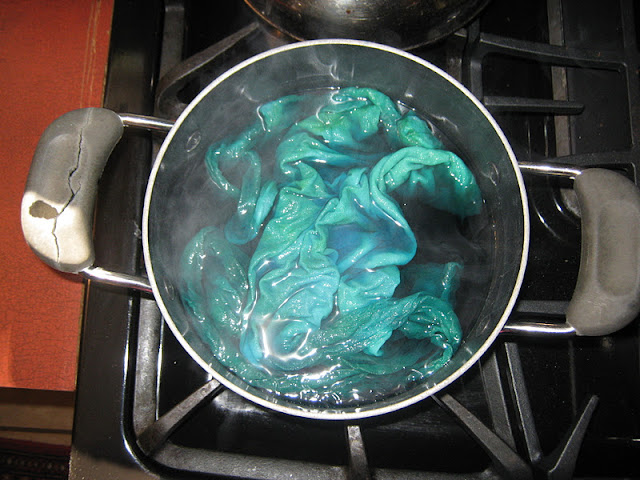
Turquoise


Apricot


add the tights

***make sure that you are constantly stirring and evening out the tights in the water!!***


so here is where the trial and error kicks in. For some weird reason these pair of tights didnt take the green die. As you can see from the picture it soaked up all the pink and left the green in the water... weird right? Unfortunately these were tights laying around the house so I dont know what material they were to tell you to avoid but most sights advise using nylon.

What I did to salvage them:

Cleaned the water and started the process over this time using the raspberry. They took the color much better but were already a little bit splochy from the original dye so they didnt come out to great. Perhaps dying them again might even the color out.


Once the water in the pot is pretty much clear your tights are ready. Let them cool then run cold water over them and wash with a bit of soap


this was the first pair of tights I dyed turquoise. I do NO advise using sheer pantyhose but they were the only white I could find. This I would file under failure. 


then I tried it again with another pair of tights from home. Again I dont know what material they are but I can say that the thicker more solid the tight the better.
Up really close they look a little uneven in color but they actually came out really evenly


Here are the pink ones you can see how splotchy they are


I took some picture wearing them but the lighting was really bad so Ill try to get some better shots this weekend. 

If any of you try this let me know id love to hear how it turned out and see your results. Also any advice on methods are always welcome! 

Happy dying!